1988 Flex Plate and Crank End Play Check Procedure w/pics
Over the last couple of weeks, I had the chance to get under
First lift the car so it is safe and secure and plenty of room underneath to
work.
Remove the rear belly pan and the front belly pan.
If you have the stock exhaust installed with heat shields and you've never
taken the flywheel cover off, you will probably have to drop the exhaust system
from the exhaust manifold a few inches in order to get at the rearmost bolts of
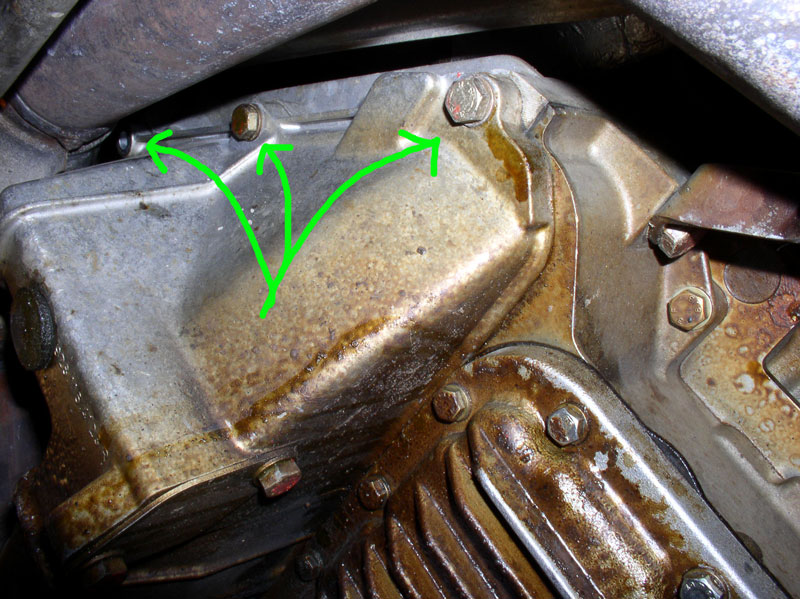
the flywheel cover. The flywheel cover has six 13mm bolts holding it in place
(3 bolts on each side) and the two rearmost bolts are right above the exhaust.
See pic below.
I had to remove the six exhaust flange bolts/nuts (3 on each exhaust manifold)
and detach the air pump injection tube from the connection bolt near the
exhaust manifold flange. I supported the exhaust system with a small hydraulic
floor jack while I removed the two rearmost bolts on the flywheel cover. Then I
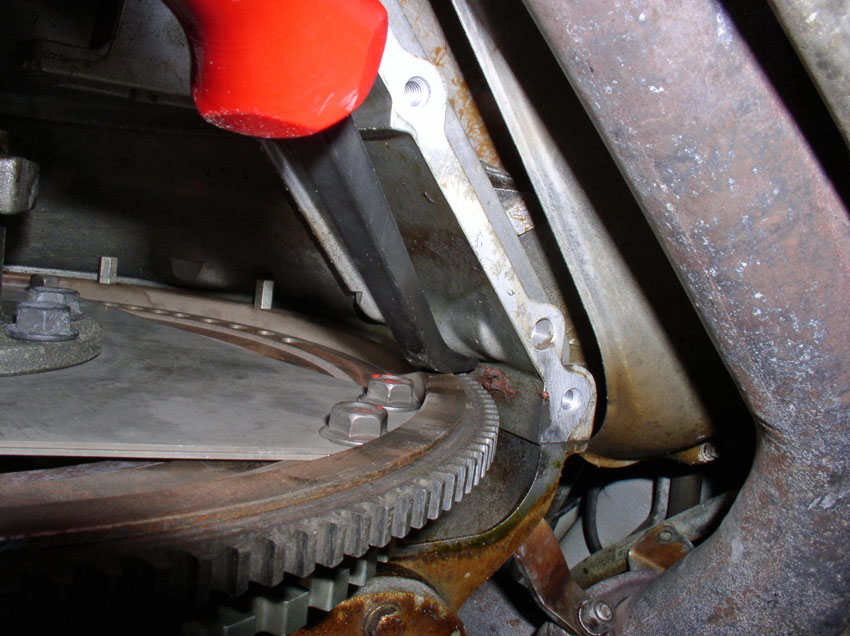
removed the other four 13mm bolts from the flywheel cover and removed the cover
(see pic below). I decided that I would not replace
the 2 rearmost bolts in the flywheel cover since I'd be taking the cover off
annually to perform this check. If you also choose to take this route, after
the flywheel cover is removed, you can reconnect the exhaust sytem and air pump injection line as before and remove the
floor jack to make more room. The flywheel cover will be re-installed with four
13mm bolts instead of six.

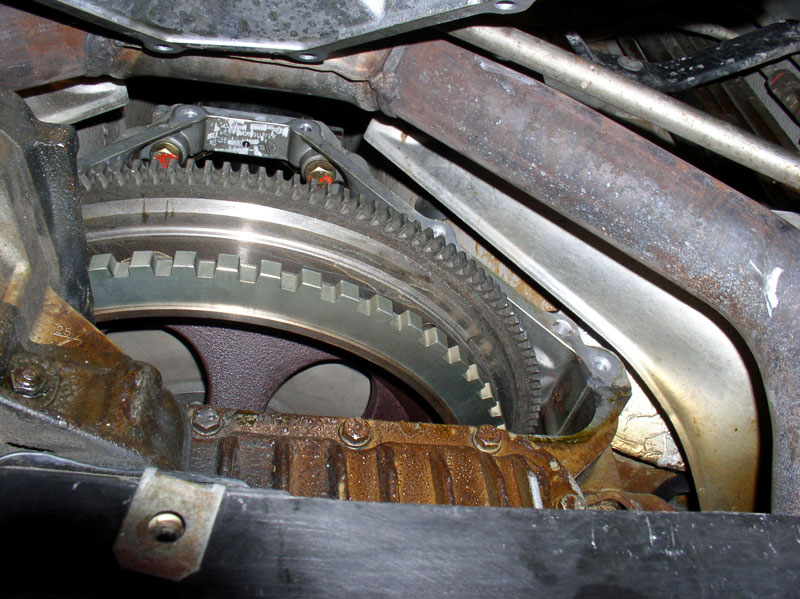
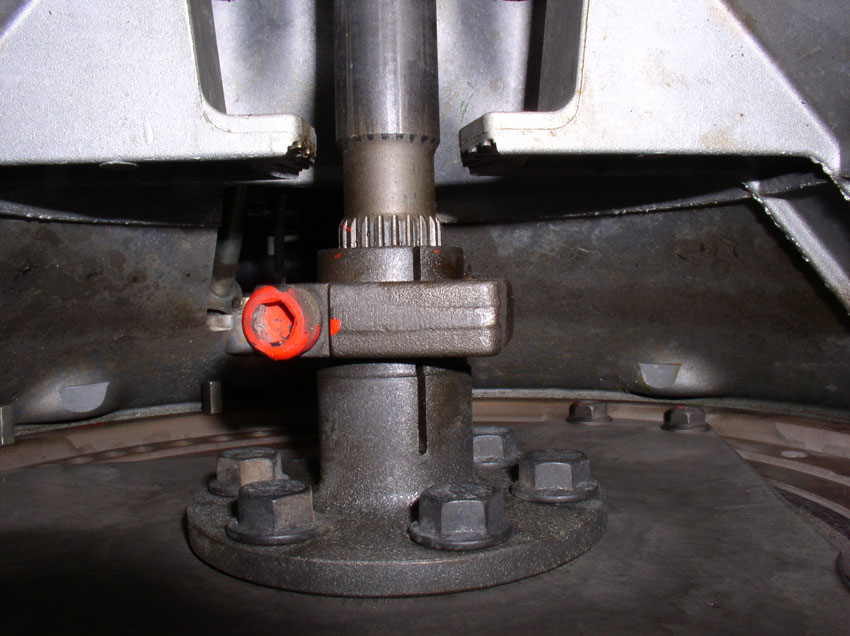
After the cover is removed, the flywheel is exposed.
I took a picture of the front Torque Tube bearing for historical purposes...
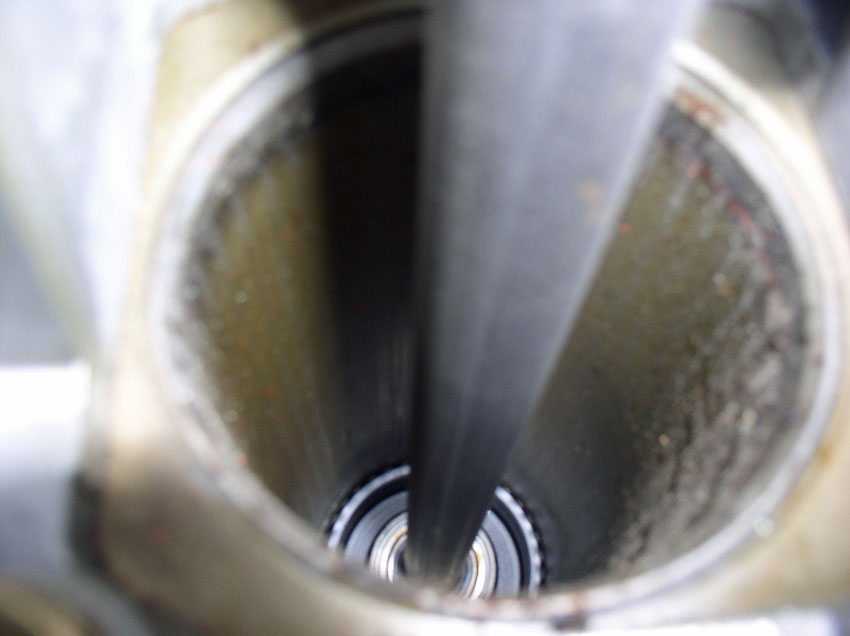
...and measured the distance between the bearing and the front of the Torque
Tube (TT) casing. It's just under 11.25". I will
check this measurement next year at this time to see if there is any movement.
Next, I checked the flex plate tension at the TT clamp. You will need to rotate
the engine (crank) clockwise enough so you can get access to the 8mm allen head bolt on the TT clamp.
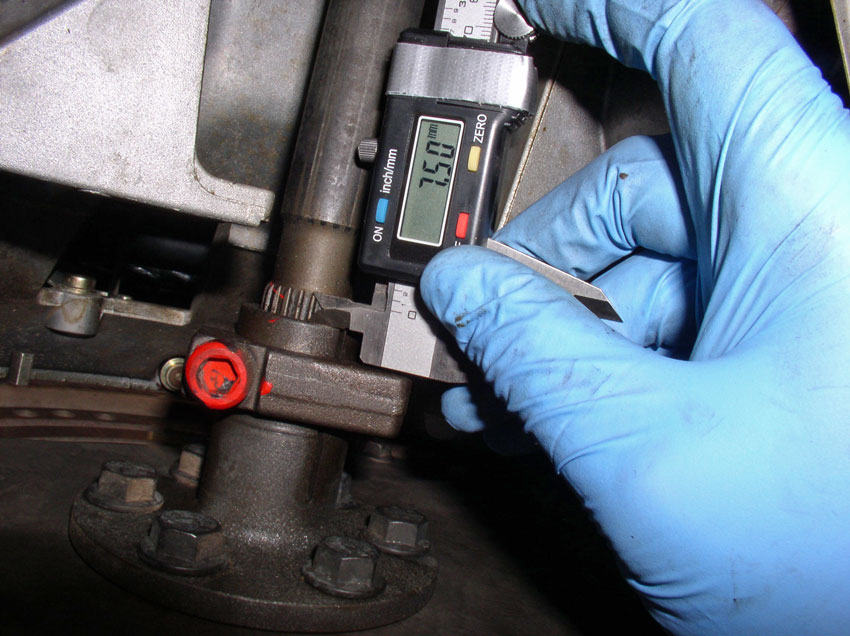
I then used a digital micrometer to mesure the amount
of spline exposed toward the rear of the clamp. I
measured 7.5mm before releasing the clamp and flexplate
tension.
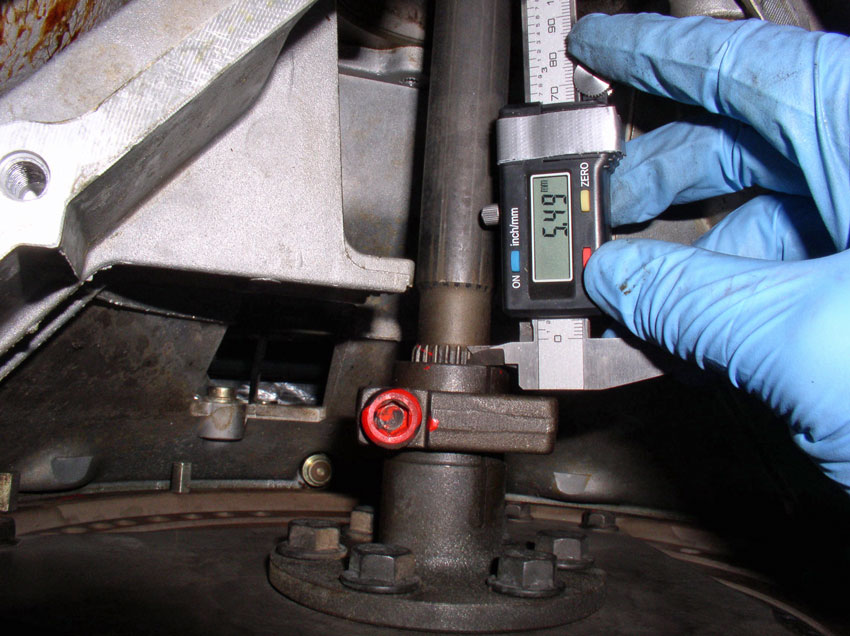
After loosening the allen
head bolt, you can actually watch the clamp slide rearward on the splines as the tension is released from the flex plate. I
took another measurement after loosening the bolt and I measured about 5.5mm.
There was about 2mm of tension on the flexplate which
results in forward pressure on the crank Thrust Bearing.
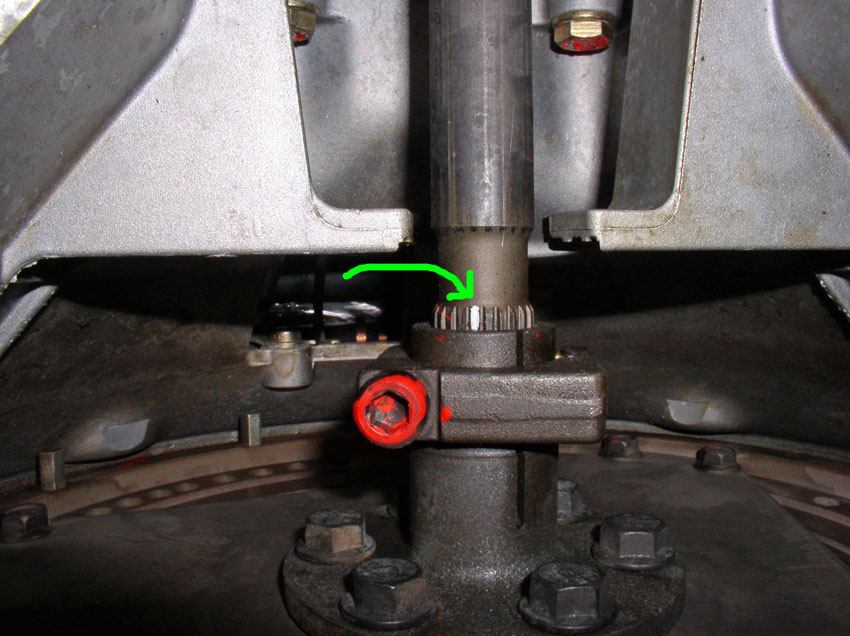
Next, I marked one of the splines with white paint
(after tension was released) starting at the rear facing surface of the clamp
(see pic below). The next time I check the flex plate
tension, I should be able to tell if the clamp has moved visually indicated by
any gap between the white mark and the rearward clamp face.
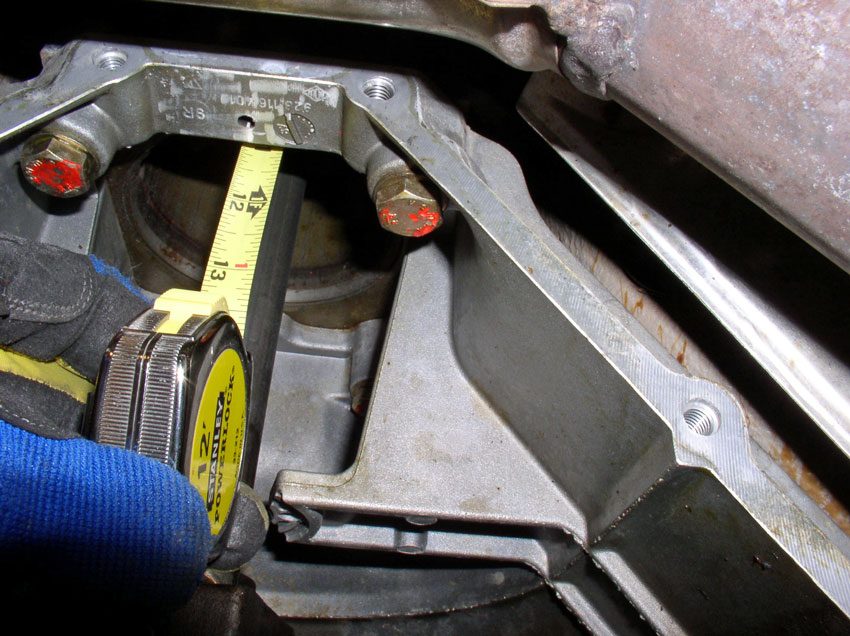
While the clamp was still loose, I checked the crank end play. Using a small pry bar, lever against the engine block and flywheel
to move the flywheel rearward. It does not take a lot of force.

Then using the digital micrometer, pick a suitable location to measure distance
between the engine block and flywheel. In this case the distance is 19.76mm.
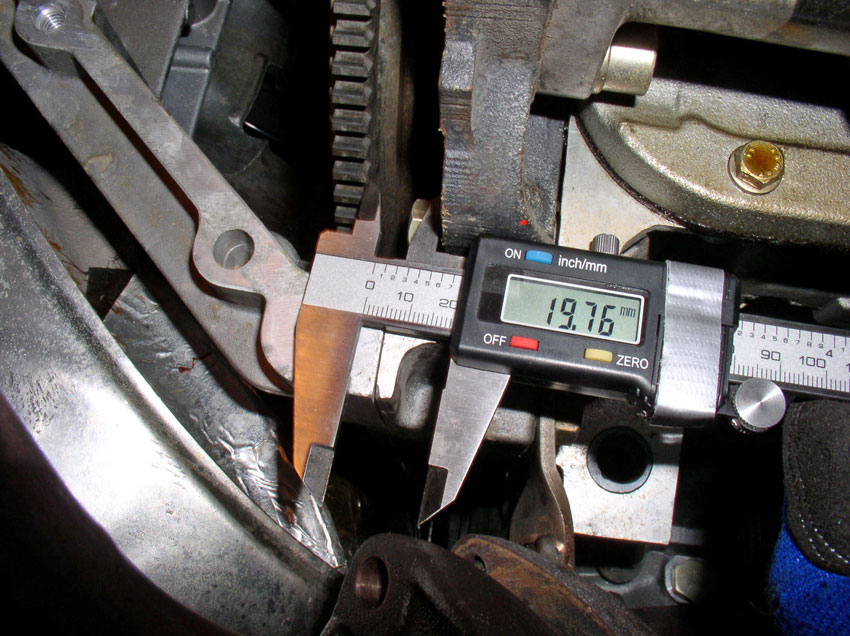
While holding the micrometer in place, take the pry bar and now lever against
the bellhousing and flywheel to move the flywheel
forward toward the front of the car (see pic below).
You should see the distance close on the micrometer. My distance closed to a
distance of 19.56mm for a crank endplay measurement of 0.2mm. The WSM states
new endplay is between 0.11mm and 0.31mm with a wear limit of 0.4mm. This
measurement indicates the end play is within spec. If you record the
measurements each year, you can monitor, regularly, any changes in Thrust
Bearing wear.
To finish this check procedure, I levered the flywheel rearward and torqued the allen
head clamp to 65 Ftlbs. Then installed the flywheel
cover and installed the four forward 13mm bolts and torqued
these to 15 Ftlbs.
After that, you can replace the front then rear belly pans and safely lower the
car.
Feel free to comment or add any advice or improvements to this simple
procedure. As always, THANKS for reading!
Version